From the previous post we have successfully set up the ubuntu VM template, deployed Rancher, and set up the requirements to deploy our template from Rancher - it’s now time to deploy the first cluster!
Creating the first cluster
From the Rancher main page, click on Add Cluster. Then, select vSphere under the Create a new Kubernetes cluster section.
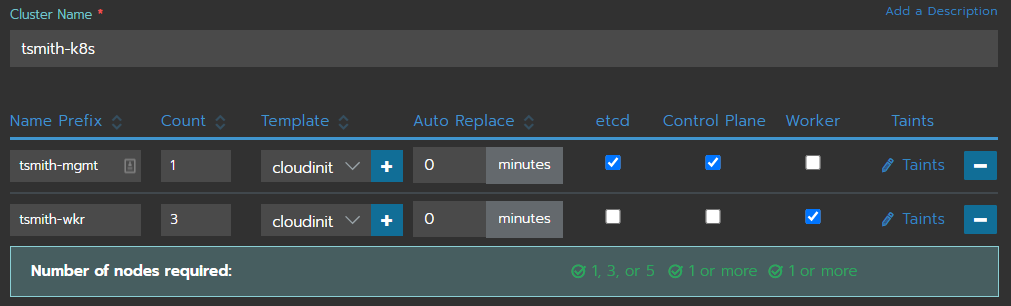
Now give the cluster a name, in my case “tsmith-k8s” and choose how to divide up the cluster. I’m going to choose 1 management node and 3 worker nodes.
On the first node, input the name prefix - “tsmith-mgmt” - and select the node template previously created in the drop down list. Select the etcd and Control Plane checkboxes, and clear the worker check box. Next, click Add Node Pool and input a name for the worker nodes, “tsmith-wkr”. I’ve increased this count to 3, selected the same node template, and reversed my checkboxes so that only Worker is checked.
Under Kubernetes Options there’s the ability to change the kubernetes version, as well as change the network provider, however, I’m going to stick with the defaults. The only thing to change is to select the radio button External under In-Tree Cloud Provider. This is required since we will be using vSphere as our cloud provider.
Click CREATE to start the deployment! At this point, Rancher will instruct vSphere to deploy 4 VMs from the Ubuntu template, and will customize according to the node template properties. Everything needed to run a Kubernetes cluster will be deployed into the nodes. An Provisioning message will be shown in the Clusters view until all nodes are deployed, and kubernetes is configured and accessible on the new cluster.
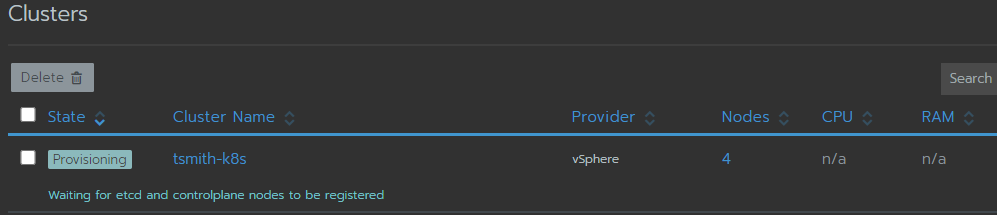
Depending on storage, this could take a couple minutes. Once our cluster reaches an Active state, the last step is to deploy the vSphere CSI App into the cluster.
vSphere CPI & CSI
To install the vSphere CPI and CSI, click into the Explorer for the cluster and in the upper left, choose Apps & Marketplace from the drop down. We will be deploying the CPI chart first, followed by the CSI.
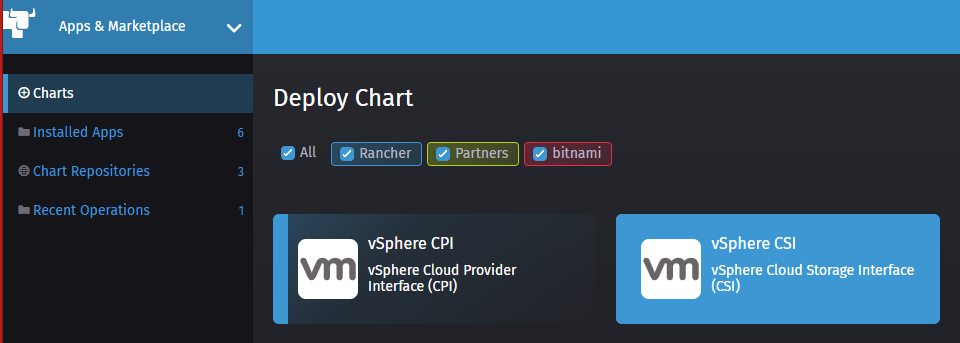
Click on the vSphere CPI chart, and under configuration, enter in the vCenter name or IP, your datacenter, and credentials, then click Deploy.
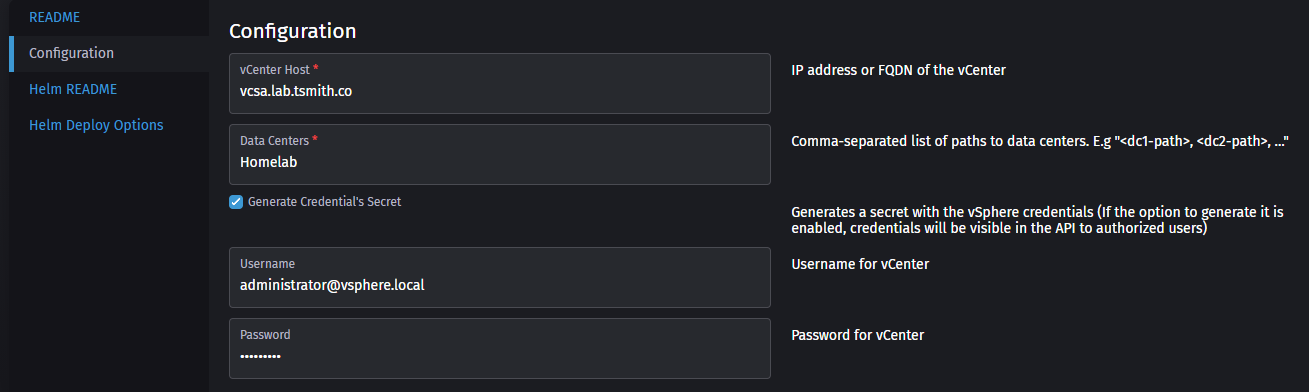
Once the CPI shows deployed, we can continue on to the vSphere CSI. From Charts, select vSphere CSI, and go to configuration. We will enter the same information again, vCenter, datacenter, and credentials. Additionally, you can enable Migration if you are using vSphere 7u1 or higher. Last, if you have more then 1 datastore, and you want to specify what datastore to use, you can do that under storage, and enter the datastore url. I left this blank. Click Deploy.
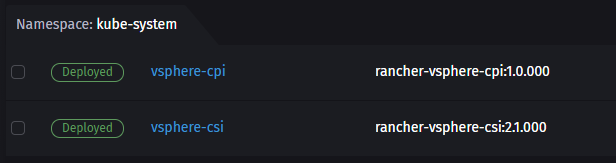
We will now see that the vsphere-cpi and vsphere-csi are deployed into the kube-system namespace.
To verify we have a storage class setup within the cluster using that CSI, select the cluster from the Global drop down menu. Then selectthe Launch kubectl button to access the cli on the browser. At the prompt, type:
kubectl get storageclasses

The new storage class was created successfully, is now default, and uses the vSphere CSI. Continuing this series, the following posts will cover adding this cluster into the kubeconfig, installing some sample apps, installing Kasten K10 to backup our stateful workloads, and finally using K10 to recover those workloads. Stay tuned!