In the previous post , we covered the architecture of the lab, installing Rancher in an Ubuntu VM, and then setting up an Ubuntu template for consumption in Rancher.
In this post, I’ll show how setup a new node template to easily deploy nodes into a cluster.
vSphere Node Template
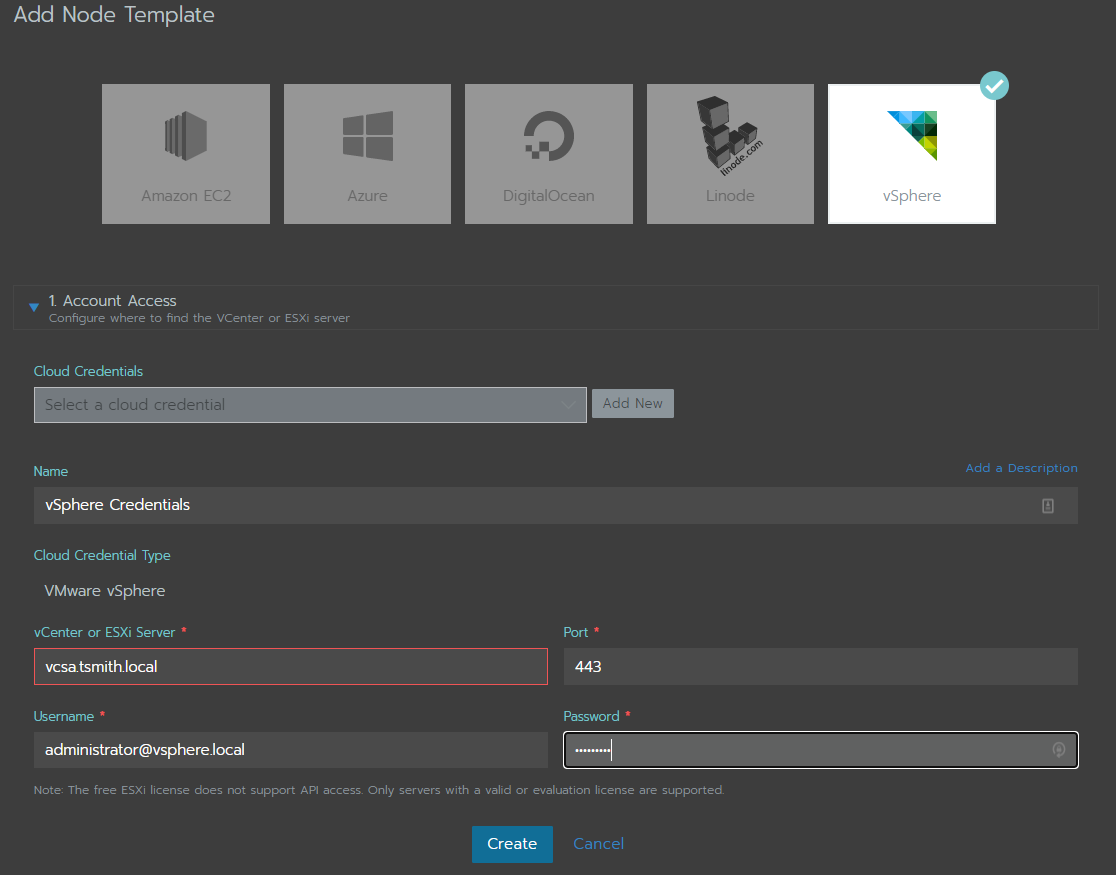
The first thing to do is to setup a node template inside Rancher so we can automatically consume the Ubuntu templates created in vSphere. To setup a new template, select the user icon in the upper right, and choose Node Templates from the drop down list. Then select Add Template.
Next, select the vSphere icon, and under 1. Account Access choose to add new credentials. Give the credentials a name, and enter in the address for vCenter (or ESXi) and the username & password for that server.
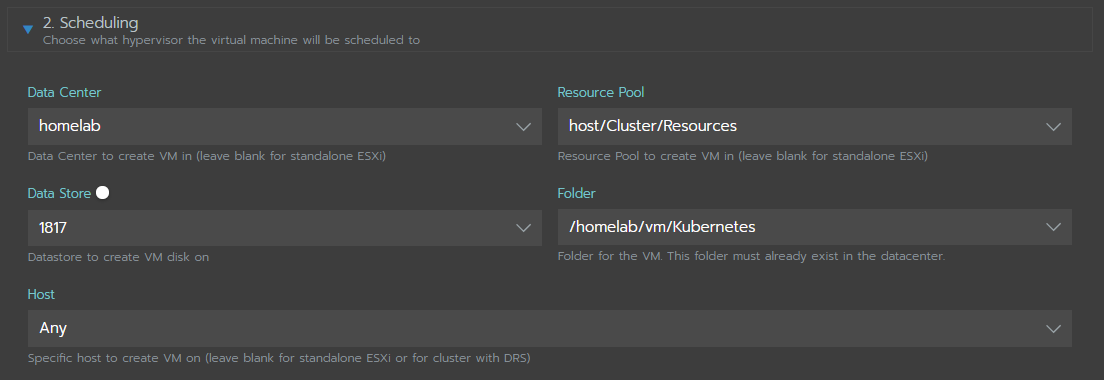
Next, in the 2. Scheduling section, input the information on where to deploy the cluster in the vSphere environment. Choose the Datacenter (if using vCenter) along with the Resource Pool, Golder, and Datastore that will hold the deployed Ubuntu VMs. Last, choose what host the VMs can be placed on. For my environment, I choose the default resource pool and a pre-setup VM Folder, along with my Synology 1817+ storage, and left the default of “any” host.
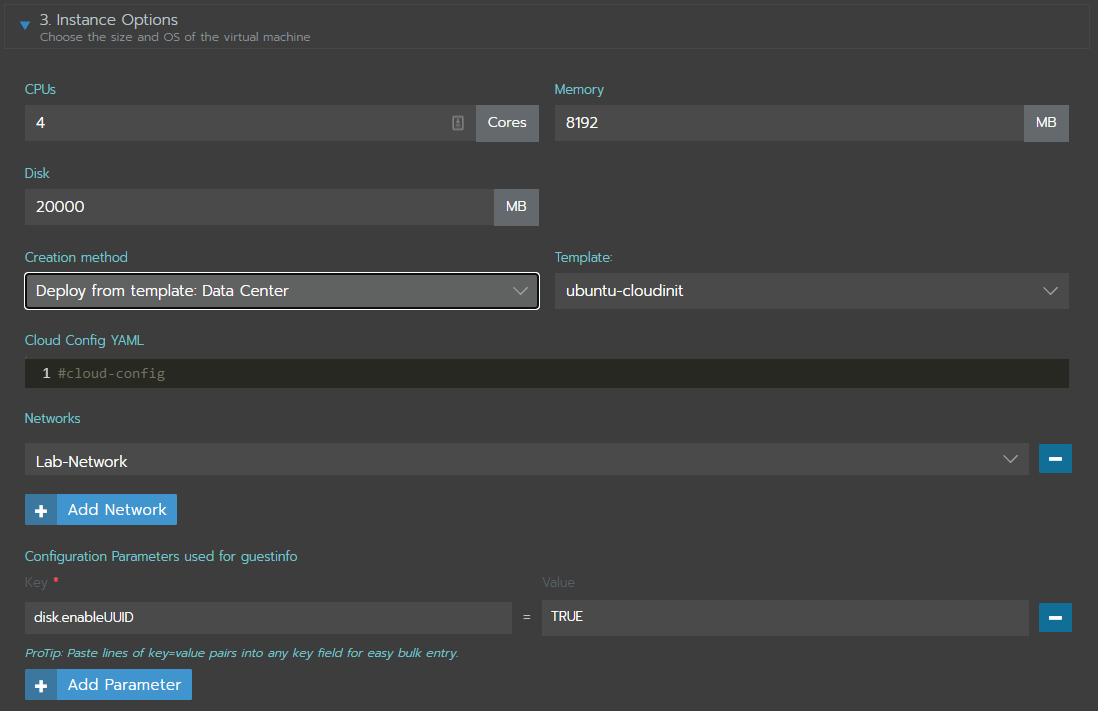
Now it’s time to select the Ubuntu template, and choose it’s sizing in 3. Instance Options. I chose to go with 4vCPU and 8gb RAM for each node, as well as 20gb disk space. Under Creation Method is the options for the source of our nodes:
- Deploy from template: Data Center
- Deploy from template: Content Library
- Clone an existing virtual machine
- Install from boot2docker ISO (Legacy)
Since I created an template, I selected the first option, Deploy from template: Data Center, and under the Template selected my ubuntu template named “ubuntu-cloudinit”.
Next pick the network the template will deploy the VMs onto, in my case “Lab-Network”.
Last, under C onfiguration Parameters used for guest info, add the key disk.enableUUID and set to TRUE so the vSphere CSI will work properly.
Finally, there are a couple more options that can be set, however, I left them all at default:
4. Tags - use vSphere tags for deployed VMs
5. Custom attributes (legacy)
6. vApp Options - organize the VMs into a vApp
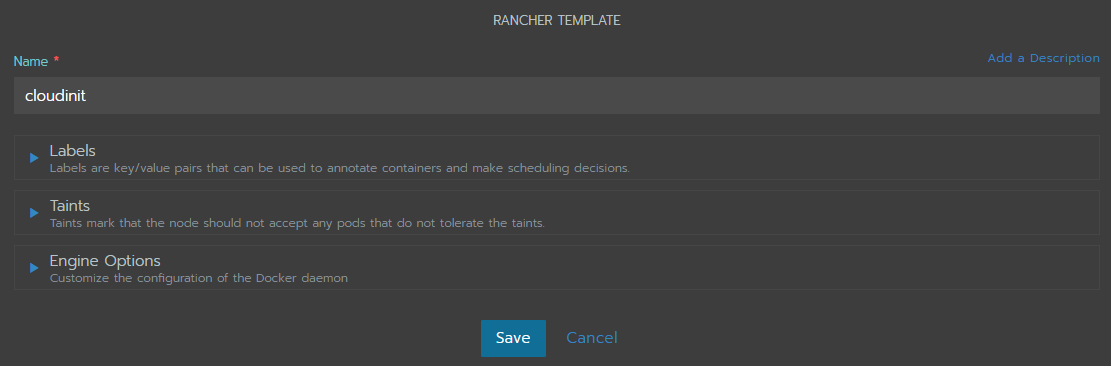
Give the template a name - “cloudinit” in my case - and choose SAVE.
Time to deploy the cluster
Now that all the building blocks are put in place, it’s time to deploy the cluster….. which will be in the next blog post!
In the next post we will create a new cluster and watch as a Master and 3 worker nodes are setup, and automatically configured for our vSphere storage.