 I’ve been using various products along the way to backup Virtual Machines in VMware Environments. However, it wasn’t until mid 2011 that I was really introduced to Veeam. So, I figured I would share my experience.
At my previous job, we were to treat all VMs as physical machines – installing a backup agent inside the VM, and backing them up through the network to a dedicated backup location – usually a tape or tape library. This was a fine solutions a couple years ago – but is obviously outdated now for a lot of networks.
Installation:
Couldn’t be more simple. After using Backup Exec for many years, I was surprised on how small the installation file was, and how simple the install was. Next, next, next, and I was done. (Really, you can’t mess that up).
Configuration:
One thing a noticed right away, is that Veeam Backup and Replication is laid out very well, and is an intuitive interface, even before the release of 6.1. The main console has 5 sections: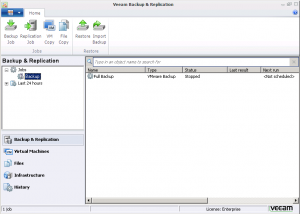
- Backup & Replication
- Virtual Machines
- Files
- Infrastructure
- History
Most of this is self explanatory – Your backup jobs, backups, and replication setup is all in Backup & Replication.
Virtual Machines contains the same tree that your see in vSphere for the hierarchy of hosts and VMs.
The Files section contains access to all your datastores and it’s VM files (.vmx, .vmdk, etc)
History ( I know, out of order here) contains all your jobs histories, whether backup, replication, zip, restore, or system.
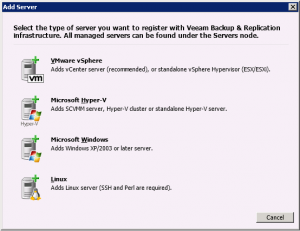
Infrastructure is for setting up your Backup Proxies and your Backup Repositories – or Backup locations if you will, Sure Backups settings (more on this later), and your managed servers. This is where your vCenter server (or Hyper V servers) go.
Once I added my vCenter server, the entire tree was imported, allowing me to see all my ESXi servers.
Also notice that “This server” appears under Microsoft Windows – the Veeam server will always show up here, as well as any other machines that act as a proxy for backup.
Backup and Replication:
Here is where the magic happens. Setting up a new backup job is simple – but has all the advanced options you need without the clutter.
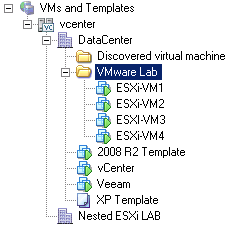 After naming the backup job, the next screen asks what you want to backup. Once you click Add, you are presented with the familiar Hosts & Clusters tree (Assuming VMware users here, not Hyper V). In the upper right, you can switch views, to VMs & Templates, or Datastores & VMs. I prefer the VMs & Templates because I keep my VMs in Fodlers for organizational purposes, and I can simply choose to backup that folder. By selecting the folder, all VMs in that folder will be backed up, as well as any VMs that end up in that folder later in vSphere.
After clicking next, we are presented with the Storage tab. For a lot of people, defaults here are all fine. The Backup Proxy is the device you want accessing the VM’s files (.vmx, .vmdk, etc). The default selection is Automatic, which will choose the best proxy (more on those later). Backup Respository is the location we are storing our backups. Veeam creates a backup folder locally during install. More can be created to the location you prefer.
Next is the number of restore points. Default is 14 (2 weeks if you are doing a backup a day). Finally, the Advanced button. Here, we can choose the backup type (Incremental, or Reverse Incremental), compression levels, notification, scripts to run after the backup job, and much more. Excluding notifications, and scripts, most SMB customers will leave this all defaults.
Guest processing – By enabling application-aware image processing, we can have the vmware tools instruct Microsoft’s VSS to quiesce aware applications (Exchange, SQL, etc…) The advanced button will let us choose what to do with transaction logs for those applications, and if we want to require successful application processing, ignore, or disable.
Last is our schedule for the backup job. This is really self explanatory. The option for automatic retry is nice. Occasionally, in my lab – resources are slim – and sometimes Veeam won’t get a response from vCenter in time, and will have to retry a VM or 2. In production, this is a rare event.
Conclusion:
Veeam is a great product that was obviously well though out. With the latest enhancements in 6.1, it’s darn near perfect. Backing up VM’s live, agentless, and in record time – and the ability to replicate, zip, and do application level restores with SureBackup – it’s a must have for any virtualized environment.
Stay tuned for more posts regarding the backup process, SureBackup, and some of the new features in 6.!

