
Veeam Backup for Microsoft 365 is about to release version 8! There’s a lot of exciting features coming, including immutability to the primary repository, where v7 has immutability on backup copy repositories only. One requirement however is that for either of those, the backup repository must reside on object storage that supports object lock. Now, with many different options for object storage, including on-premises, this typically isn’t a problem at all - and, and object storage repository is actually more performant, and has better compression when compared to a local disk repository in Veeam Backup for Microsoft 365 (VB365).
But, there’s a lot of times when object storage may not be available or practical for some end users. So, using a local disk is the other option for VB365. This post will cover how we can use a Synology NAS to provide storage via iSCSI, and immutability with Synology snapshots!
Creating a LUN on the Synology
I’m going to assume that Veeam is already installed, and the Microsoft 365 organization has already been added into the console. In my lab, everything runs on the same subnet, but best practices would be to isolate iSCSI to a separate physical network or VLAN. So, let’s go ahead and get some storage presented! First, log in to the Synology (a DS923+ in my lab) and let’s go to the SAN Manager.
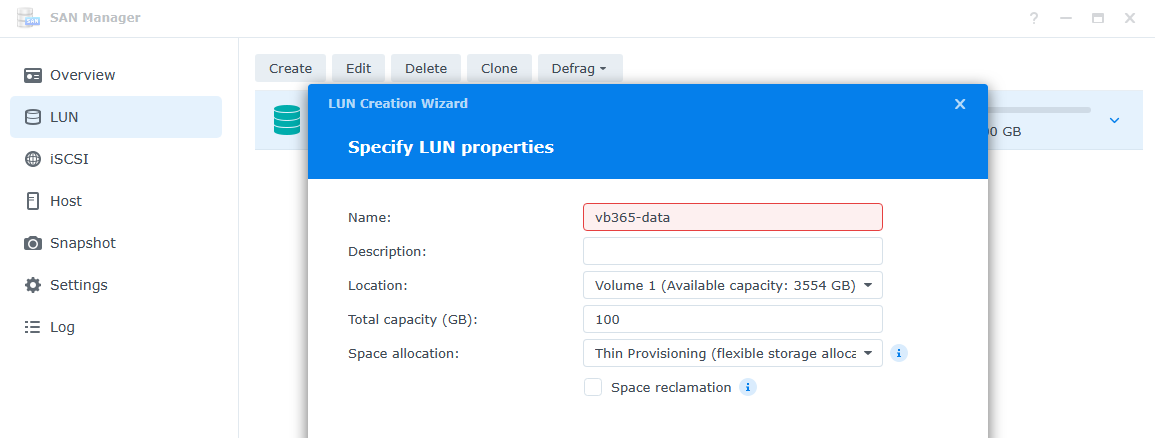
I’m leaving all the iSCSI settings default, which includes the iSCSI target on the Synology and the target is available to all hosts. Navigate to LUN, and click Create. Here we will give our new LUN a name " vb365-data", and choose a volume, in my case, my only volume is " volume 1". I set this virtual disk to 100GB, and changed the Space Allocation to Thin Provisioning, which allows us to use the snapshotting feature.
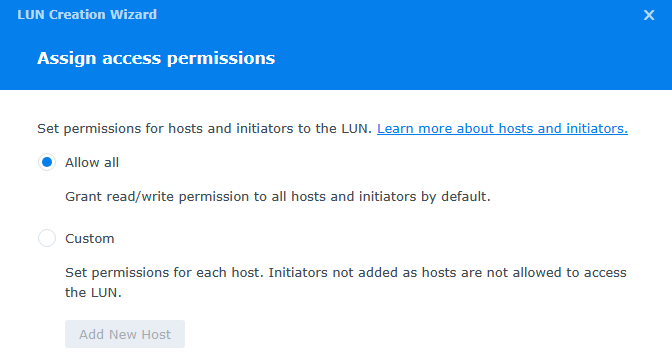
After clicking Next, choose the default iSCSI target (or whatever target you have setup on your Synology). The iSCSI target is the endpoint where the guests (iSCSI initiators) connect. The iSCSI target is setup with an IP, and is assigned LUNS to host, and security measures as well if implemented to restrict what initiators can connect to it. Clicking Next, we are presented with the ability to restrict this LUN to particular hosts (initiators). I left this Allow All for now. After one more Next, we can review our settings and click Finish.
Windows iSCSI Initiator
Now the the Synology is setup with a LUN assigned to the iSCSI Target, it’s time to setup the host that will connect. On your Veeam Backup for Microsoft 365 server, let’s click Start, and type " iSCSI". the Microsoft iSCSI Initiator will show up, and we can click on it, and follow the on-screen prompts to enable the service.
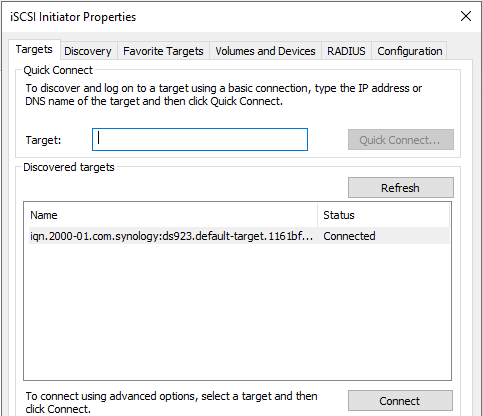
Once it’s installed (you may have to reboot) open up the iSCSI Initiator again, and you can now connect to an iSCSI Target. There’s a lot of options, however, for this lab, we are going to keep it simple. I’m going to type the IP of my Synology 923+ into the Quick Connect box and hit enter. This will allow the Initiator to connect and discover and LUNs assigned to that Target, that are allowed to this host. Since we’ve allowed all hosts, our 100GB LUN will show up in the list. We can select it and click Connect.
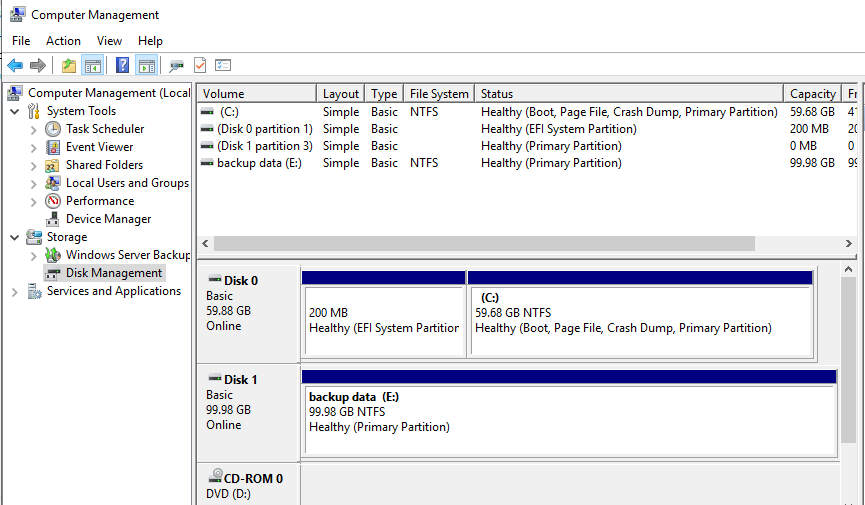
What does this do? Essentially, this is the same thing as plugging in a new hard drive. It makes this new 100GB virtual disk visible as available storage. However, we still need to initialize and format this empty data drive. Click Start and type " Computer management" to open the Computer Management MMC. Go to Disk Management under Storage. Here, we will see our operating system disk, as well and an uninitialized 100GB disk. Right click on the disk (Disk 1 in my case) and choose to bring online and repeat to initialize. Then, we can right click on the empty space, and choose to format this disk. Stick with NTFS and click through, as we don’t need anything besides defaults for this disk. You should end up with this:
Adding the disk as a Veeam Repository
In the Veeam Backup for Microsoft 365 console, navigate to Backup Infrastructure, and choose to Add Repository. I named my repository “Synology” and after clicking Next, I selected Backup to local disk. Clicking Next again, and can now choose where this new repository will reside. My disk above is E:, so I entered " E:\backups" into the Path. Veeam will prompt to create the directory if it doesn’t exist. After clicking Next one more time, I left the default retention mode of Snapshot Based and chose Finish.

Now that the new Repository is setup, a new job can be created to backup the Microsoft 365 organization, and our data will be stored on the Synology! You can follow Veeam’s documentation for creating a backup job here: Creating Backup Job - Veeam Backup for Microsoft 365 Guide
Database Consistency
As I mentioned, there’s 2 repository types for VB365, object storage and local disk. When using the local disk option, Veeam stores the backups in a Jet Blue (ESE) database. So a normal LUN snapshot won’t do, as the database is in use. But thankfully we have 2 things going for us here.
- Veeam installed a VSS writer for VB365, because if you back up the server with Veeam Backup and Replication, it can not only ensure that the DB is flushed and ready for backup, but also to allow the Veeam explorers to recover items without needing to first restore the VB365 server.
- Synology has the ability to do an application consistent storage snapshot when the Synology Storage Console for windows in installed in the OS.
Because of these 2 things, when the Synology snapshots are taking, the Synology VSS provider informs all the VSS writers (including Veeam) to put the data in a consistent state, meaning our backup database will be perfect during a storage snapshot!

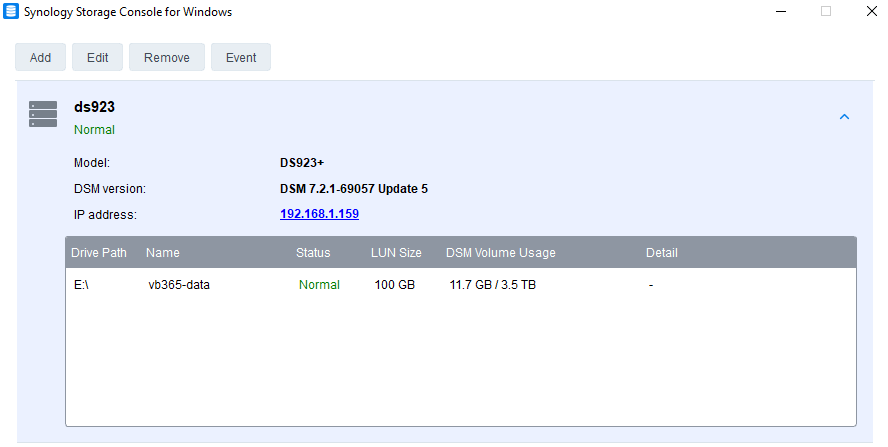
Download the Synology Storage Console for Windows from the Synology Download center here: Download Center | Synology Inc. and install inside the Veeam server. Setup is straightforward. Once installed, open the application, and simply add in the Synology NAS via IP and the admin credentials. Once it’s connected, it will show that this windows server is attached to the 100GB LUN.
This also installs the VSS provider, which you can see by typing " vssadmin list providers" in a cmd window.
Immutable Snapshots
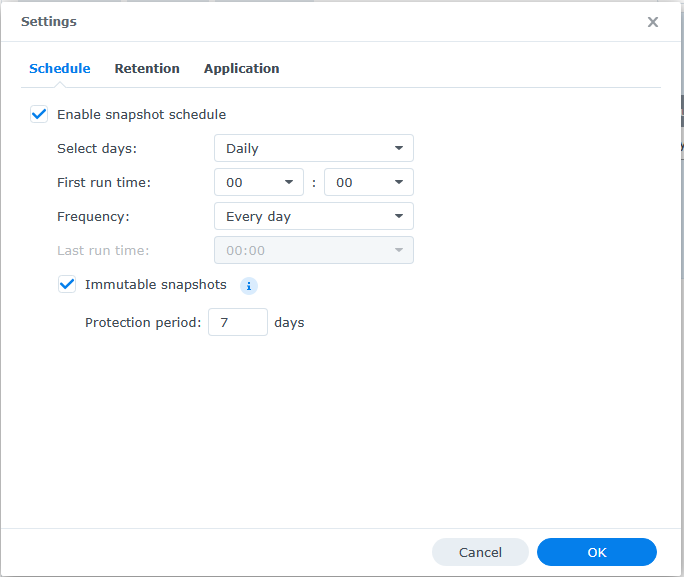
Now that the Veeam server is all setup and prepped for application consistent snapshots, let’s head back to the Synology NAS and open the SAN Manager. This time, we will head to Snapshot, and select our LUN (vb365-data) and choose Settings. Click Enable snapshot schedule, and set to a time right after your Veeam backups will complete. My backups are set to run at 11pm, so I left this schedule for snapshots to occur at midnight.
Now, check Immutable snapshots. This will make these snapshots protected from deletion or change! You can change Retention as well to keep only a certain number of snapshots. Last click on Application to check the box to allow for application consistent snapshots.
Protection!
It’s that simple! Now, in the event something happens and the server is compromised, we can simply reinstall Veeam on a new server, choose to copy the immutable snapshot to a new LUN, and attach to the Veeam server. Veeam will see the existing data and resume backups once configured, as well and restore data right away if needed. Using Synology immutable snapshots is a great way to get extra protection when object storage isn’t an option for your Veeam Backup for Microsoft 365 server.