Previously on Tim’s Tech Thoughts, I used the plugin MiniOrange to have 2 factor authentication required for logging into the WordPress admin. This worked fairly well, however during upgrades I had been accidently locked out more than once. Since I’ve been using Cloudflare for quite a while, and more recently starting using Cloudflare Tunnels for my lab and Mastodon server , I wanted to use the Zero Trust platform to also protect my wordpress site!
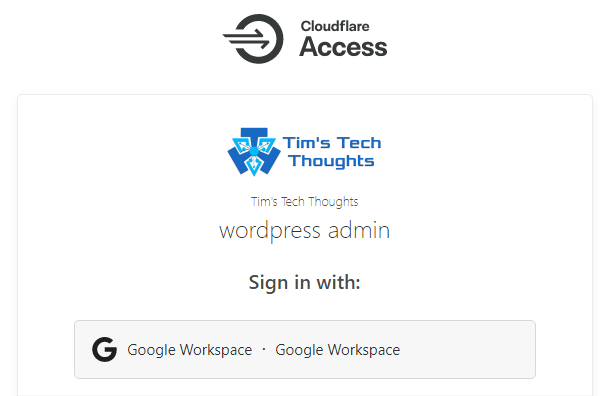
With an application protected with Cloudflare Zero Trust, anytime someone attempts to access that URL, Cloudflare will capture them and only let them through if they meet the requirements setup for authentication. In my case, authentication with Google.
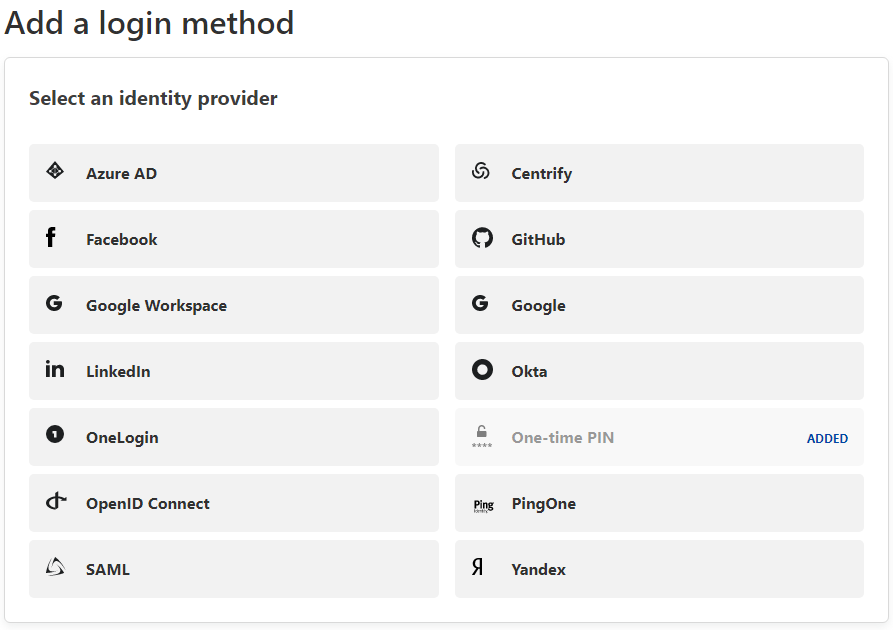
Once logged into the Zero Trust dashboard, Authentication can be configured under Settings, Authentication. By default, a One-time Pin option is available, which will send a code to the user’s email address that can then be entered onto the sign in page. Clicking Add New will show all the auth options available for Zero Trust, as well as the instructions for setting it up.
Since Cloudflare’s documentation is very easy to follow, I won’t cover setting up Google as an identity provider in this post. After the identity provider is configured, we will want to setup access to our WordPress application. This requires that Cloudflare is the authoritive DNS provider for the domain.
WordPress Application Config
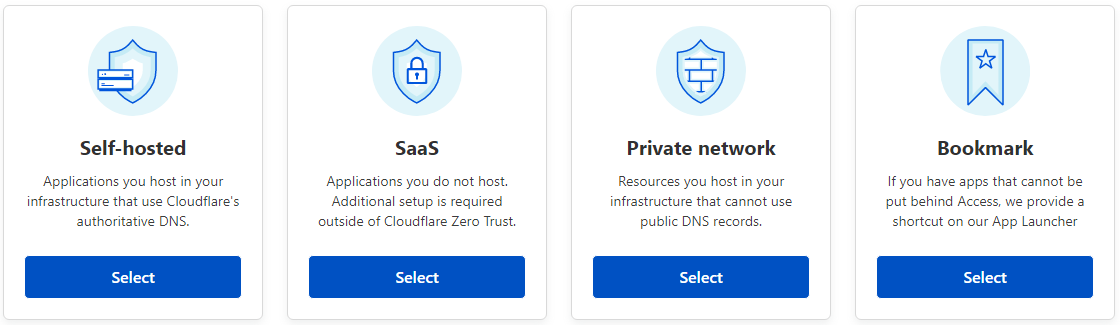
In the Zero Trust dashboard, selct Access, and then Applications - followed by + Add an application. There are 4 types of applications that can be added: Self-hosted, SaaS, Private Network, and Bookmark. In this example, we are using Self-hosted.
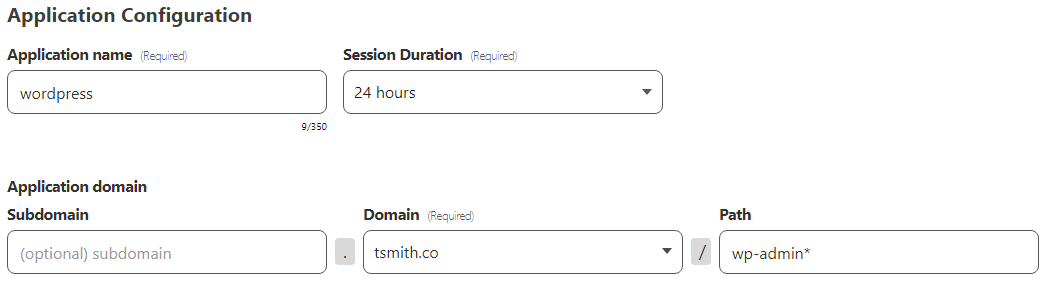
Once Select is clicked, the Configure app page appears and we can give our application a name and setup the domain and path information. I named the application “wordpress” and chose my domain tsmith.co from the drop down list. With Wordpress, there are 2 paths that will need protecting. Unfortunatly, we can only enter 1 path per application, so the workaround is simply to create a second application after the first has been completed. The first path I want protected is wp-admin*.
Identity Providers
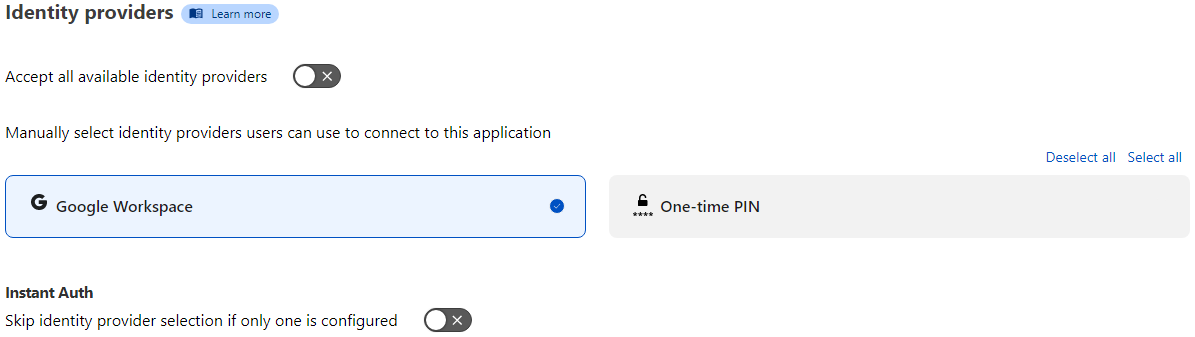
Scrolling down, the Identity Providers section because visible, and by default is set to “Accept all available identity providers.” Since I only want to use Google and not a one-time pin, I de-selected Accept all available identity providers and unchecked One-time PIN as well. The bottom option I left disable to start, so I can see the capture process, and be required to click on the Google Workspace button. However, if I enabled Instant Auth and was already logged into my Google Workspace account, then I would have been instantly redirected into the WordPress login page as I was already authenticated with Google. Click Next.
Configure Rules
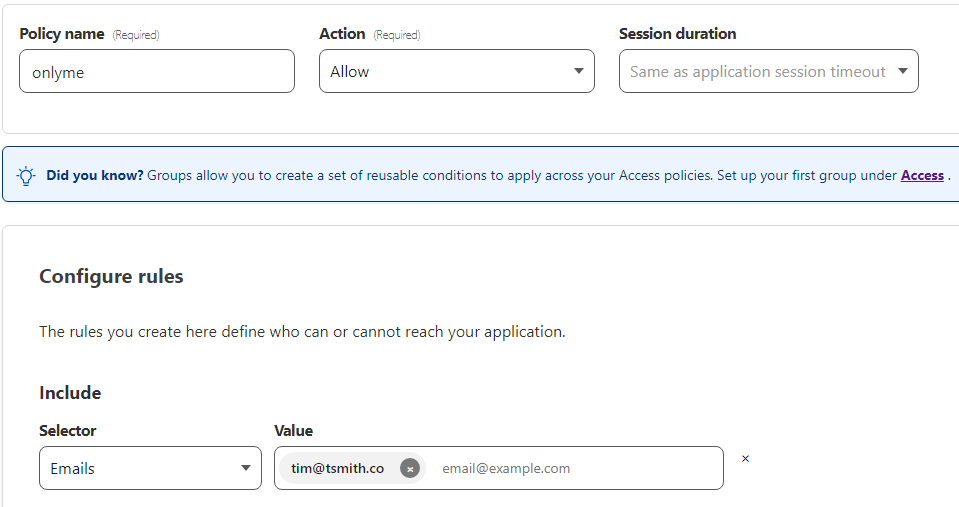
The rules page allows a policy to be setup that defines what users, once authenticated, have access to the application. Since I am the only admin on my WordPress site, I created a policy name of “onlyme” and set the Action to Allow. Under Configure rules, I chose the Selector or Emails, and set a value of “tim@tsmith.co ”. Then finished by clicking Next, and then on Add Application.
Rinse and Repeat
The final step is to simply create a second Application but this time set the Path to " wp-login.php*" instead of “wp-admin*” since this is another way to access the admin page login. Once the 2nd application was created similar the the first, I tested it out in an incognito browser window, and it worked like a charm!
