With the recent publicly available Veeam Backup for Microsoft o365 v3 beta, Modern Authentication is now supported for the account used to connect VBO to the o365 organization. This is great news, as this will allow for even better security for your o365 org!
See my previous article about the v3 beta changes and more about Modern Authentication.
This article will show you how to create an Azure app registration, setup the service account for MFA, and ensure the service account has the minimum required permissions for o365 for increased security.
Create the VBO account in o365
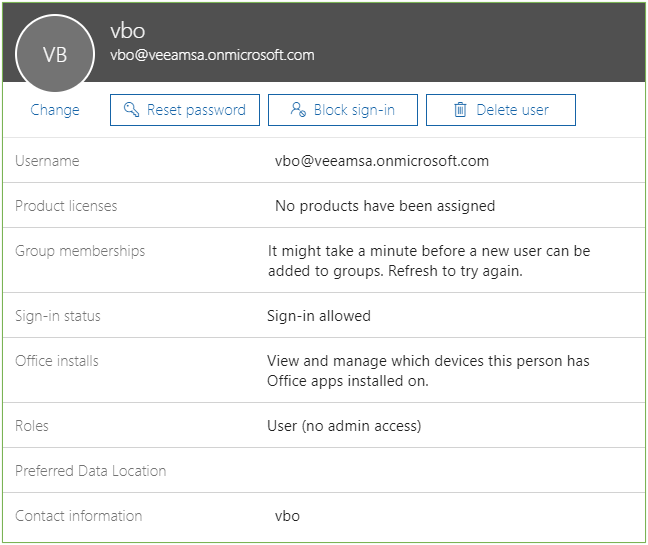
First, log into portal.office.com as an administrator, and create a new user. Do not assign a license, and set the role to “User (no admin access)”
Enable MFA for the VBO account
- Choose “Manage multi-factor authentication” from the user properties
- Select the VBO user and “Enable” multi-factor authentication
- Select the VBO user again, and choose “Enforce”

- In a different browser, log into https://portal.office.com as the new VBO user
- Click Next on the More Information Needed prompt
- Follow the prompts to setup MFA for the account
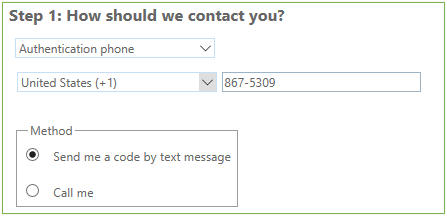
- Once your phone has been verified, MFA is setup for the VBO account
- You will be presented with an app password which we will use for VBO – copy this to notepad

Grant Required Permissions
- Open powershell as administrator
- Install
the module to connect to Office 365 via powershell
- Install-Module MSOnline

-
Run the following to connect to Office 365 (use O365 admin credentials)
-
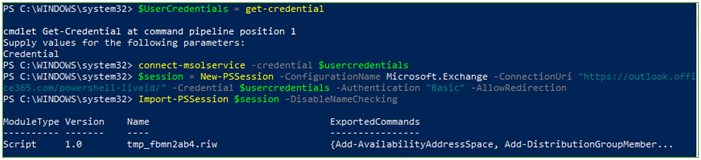
$UserCredentials = Get-Credential
-
Connect-msolService -Credential $UserCredentials
-
$session = New-PSSession -ConfigurationName Microsoft.Exchange -ConnectionUri https://outlook.office365.com/powershell-liveid/ -Credential $UserCredentials -Authentication ‘Basic’ -AllowRedirection
-
Import-PSSession $session -DisableNameChecking
-
-
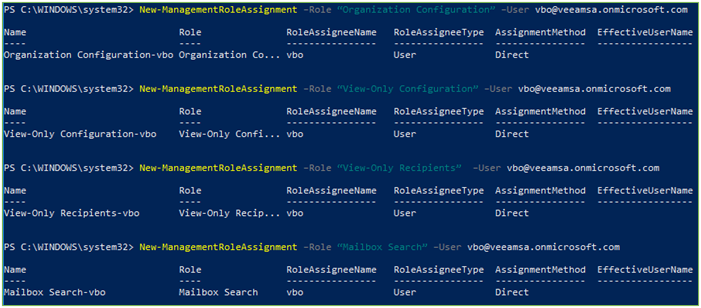
Run the following to assign required permissions to the VBO account for Exchange Online
-
New-ManagementRoleAssignment –Role ApplicationImpersonation –User ‘vbo@domain.onmicrosoft.com’
-
New-ManagementRoleAssignment –Role ‘Organization Configuration’ –User vbo@domain.onmicrosoft.com
-
New-ManagementRoleAssignment –Role ‘View-Only Configuration’ –User vbo@domain.onmicrosoft.com
-
New-ManagementRoleAssignment –Role ‘View-Only Recipients’ –User vbo@domain.onmicrosoft.com
-
New-ManagementRoleAssignment –Role ‘Mailbox Search’ –User vbo@domain.onmicrosoft.com
-
- Run the
following to assign required permissions to the VBO account for Sharepoint
Online
- Add-MsolRoleMember -RoleName ‘SharePoint Service Administrator’ -RoleMemberEmailAddress vbo@domain.onmicrosoft.com

Create the Azure Application Registration
-
In the Microsoft 365 admin center, expand Admin Centers and click on Azure Active Directory
-
Under Favorites, click on Azure Active Directory
-
Under Manage, click on App registrations
-
Click New application registration
-
Enter a Name and URL
-
Name – VBO (any unique name)
-
Application type – Web app / API
-
Sign-on URL - https://localhost (not required to be valid)
-
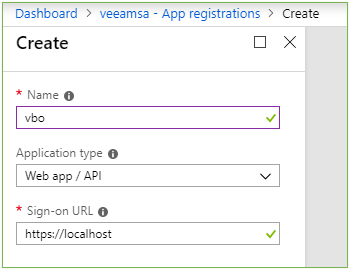
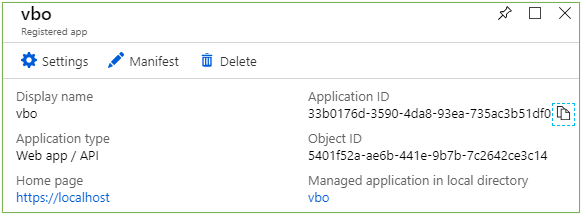
- Click Create
- Copy the Application ID to notepad to be used later in VBO 3
-
Click Settings and click Required Permissions
-
Click Add
-
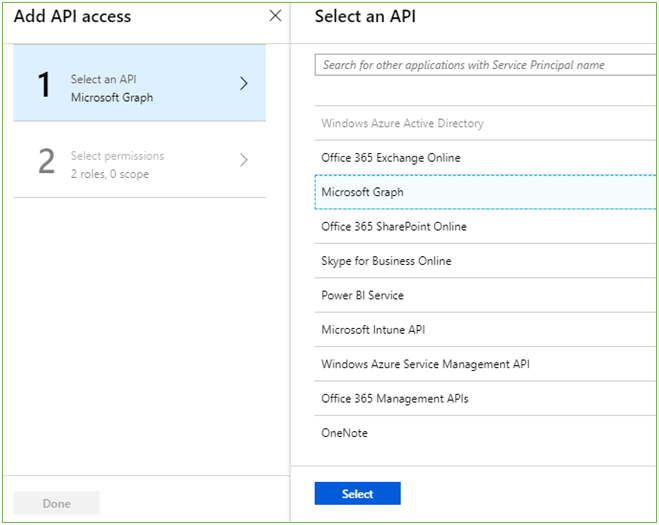
Click Select and API
-
Select Microsoft Graph
-
-
Check the following permissions and the click Select
-
Read all groups
-
Read directory data
-
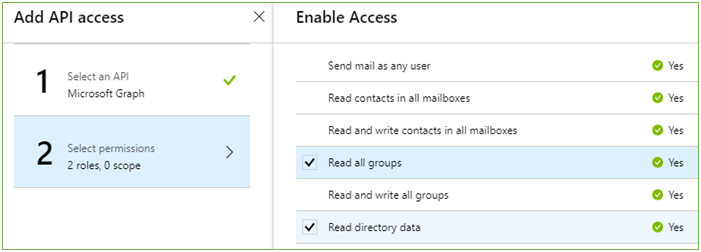
- Click Done
- Click Grant Permissions
- Click on Keys
- Create a new password key and set expiration
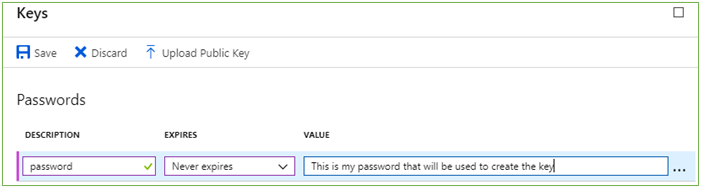
- Click Save
- A new key value now exists – copy this to notepad, as once you leave the screen – it will not be displayed again.

Connect VBO to the o365 Organization
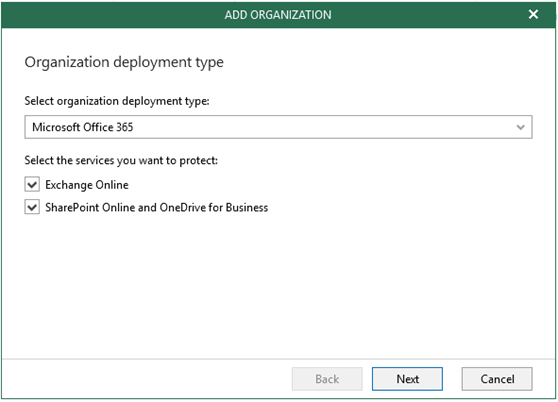
- In VBO click Add Org
- Select Microsoft Office 365 for deployment type, and keep Exchange Online and Sharepoint Online and OneDrive for Business selected
- Choose Modern Authentication for the authentication method

- Paste in the Application ID, Application Secret, and App Password that were copied to notepad.
- Enter the VBO username from Office 365
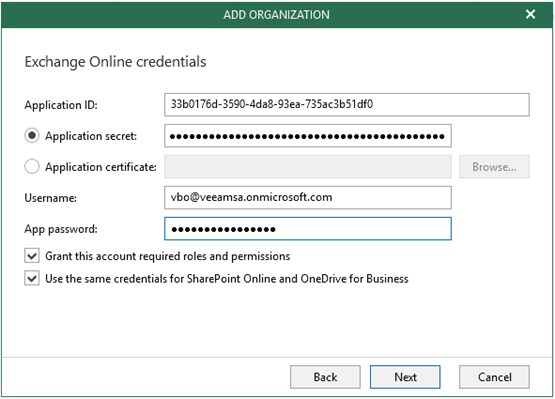
- Click Next to verify and finish adding the organization to VBO
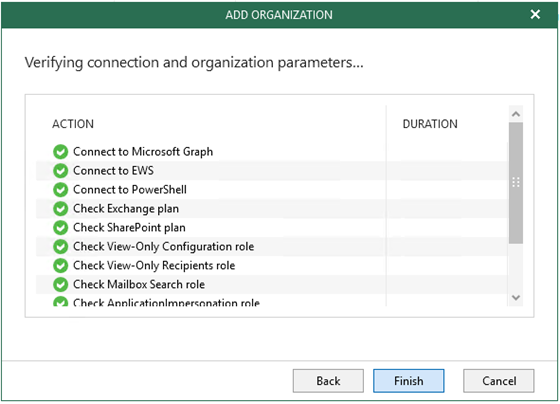
Finished!
Congratulations - you have now created an account in o365 with the minimum required permissions for backup, and crested an app registration to allow the MFA enabled account to be used by Veeam Backup for Microsoft o365 to connect to the organization.