A ways back, Synology was kind enough to send me a DS923+ to test out. I’ve used a DS1817+ in my lab for quite some time now, so a unit with an upgraded CPU was welcome. The first thing I did was upgrade it to 32gb of ram, because that opens up the NAS to be useful for more than just storage, like running docker containers! So I thought, why not run my own AI on this 923+?
Large Language Model
To simplify it, Large Language Model is a type of AI (artificial intelligence) that is trained on a lot of text data, and is designed to generate human-like responses back to the user. The most significant would be ChatGPT from OpenAI. But, interacting with those models requires the information to be sent out to a 3rd party - what happens if you want to run everything local to your own lab? Well, you will need a platform, a model, and then a webui, and in this case, I will host it all within docker on the Synology.
Containers
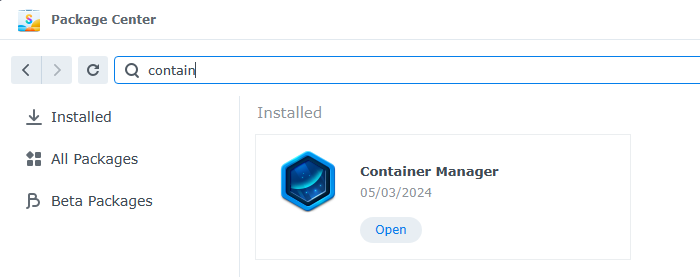
First, I needed to install Container Manager on the 923+, which is very straight forward: simply open the Package Center, and search for “container” and click install.
The platform
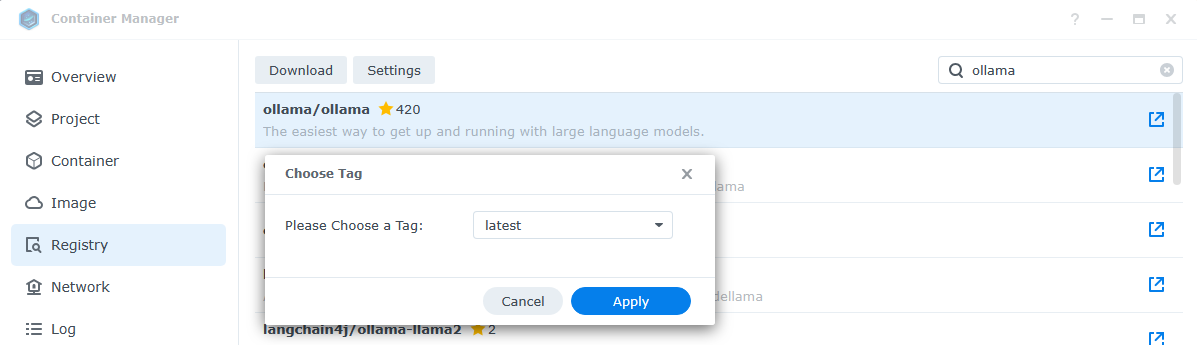
For this project, we will use Ollama (ollama.ai). Ollama is an open source project that lets users run, create, and share large language models. We will use it to run a model. In the Container Manager, we will need to add in the project under Registry. Search for “ollama” and choose download, and apply to select the latest tag. This will download the project to the local registry, but not deploy any containers yet.
Once downloaded, navigate to Container and click Create. In the Image dropdown, select ollama/ollama:latest, and the Container name will be automatically filled in. I chose to auto-restart this container in the even it crashed or something goes wrong.
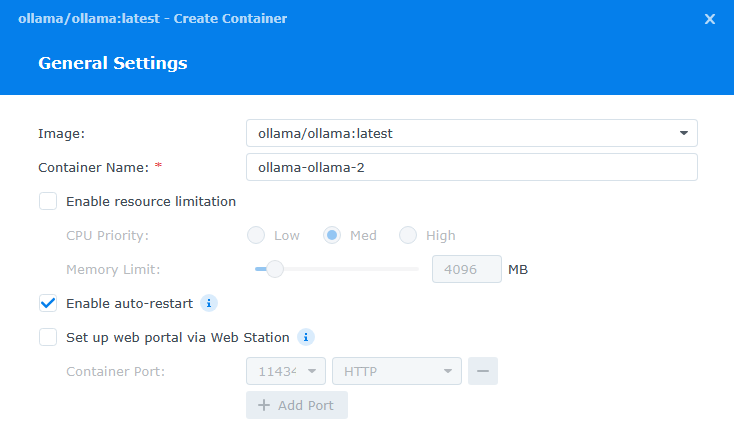
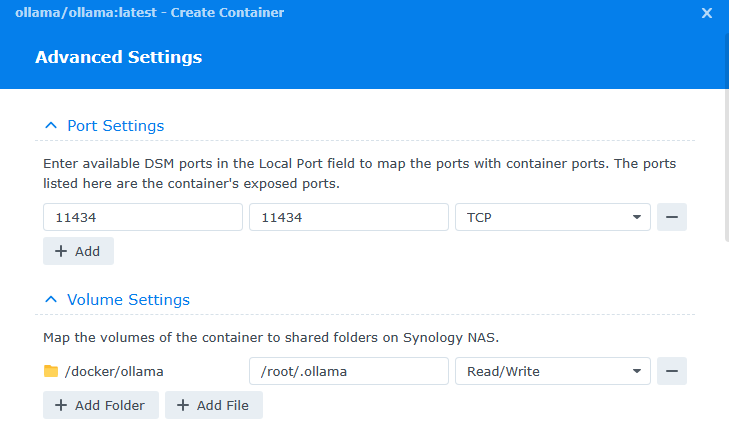
After clicking Next, There’s a couple things to fill in. First, enter in “11434” for the Local Port under Port Settings. Next, under Volume Settings click Add Folder and create a folder called " ollama" under the Docker folder. We will map this to /root/.ollama inside the container, and leave it Read/Write.
Next, finish the wizard and select to run the container. It may take a couple seconds to start.
Download a Model
Now that we have our platform, it’s time to download a Large Language Model into Ollama. Highlight the container, and select Action and Open Terminal. This will open up a Terminal window allowing us to interact with the command line inside the container. Click create, and highlight the new bash terminal that was opened.
Inside the terminal, simply type:
ollama pull llama3
This will download the model llama3, which at this time is the most recent. The other options can be found here: library (ollama.com)
Now, I could simply start interacting with this ai model now using this CLI by typing ollama run llama3, however, I want a nice webui that I can use from any PC on my network easily.
WebUI
With the new AI all setup, it’s time to use a web front end, and just like ollama, this will run in a container also. Going back to Container Manager, let’s download a new image to the Registry. Search for dyrnq/open-webui in the registry and click download. Once this image is downloaded, go the the container section and click Create. For image, select the open-webui image we just downloaded, and enable auto-restart.
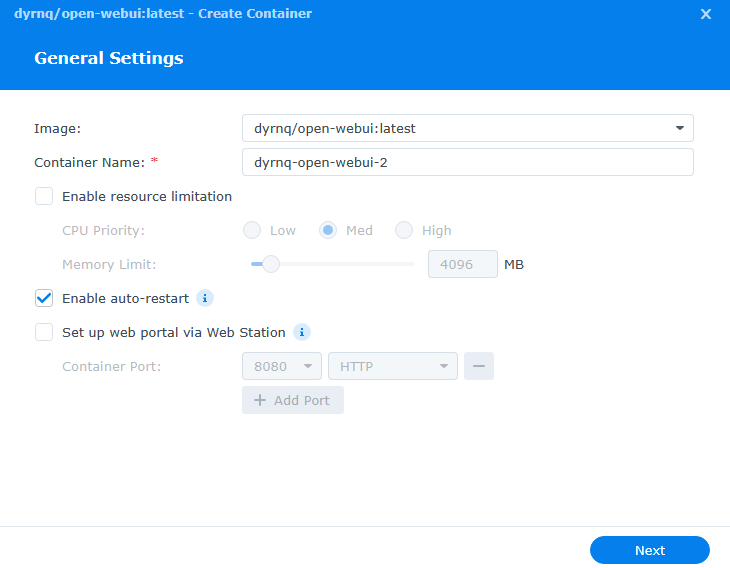
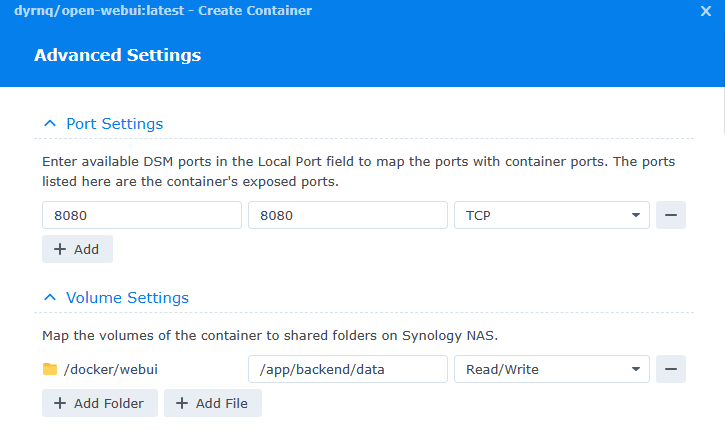
Like our first container, we have a couple of parameters to set. For the ports, I used 8080 for both the local and container port. Additionally, a new folder needs to be created to map a volume. I created a folder called webui inside my docker folder, and mapped it to /app/backened/data.
Last, under environment variables, we need to add in the url for ollama for the entry OLLAMA_BASE_URL, which i used http://192.168.1.159:11434. There are a couple other variables that don’t have entries, but they aren’t required for a lab, so you can remove them. They will highlight red when you click next, so it makes it easy to find and click the minus button beside. Then lets finish and choose to run the container.
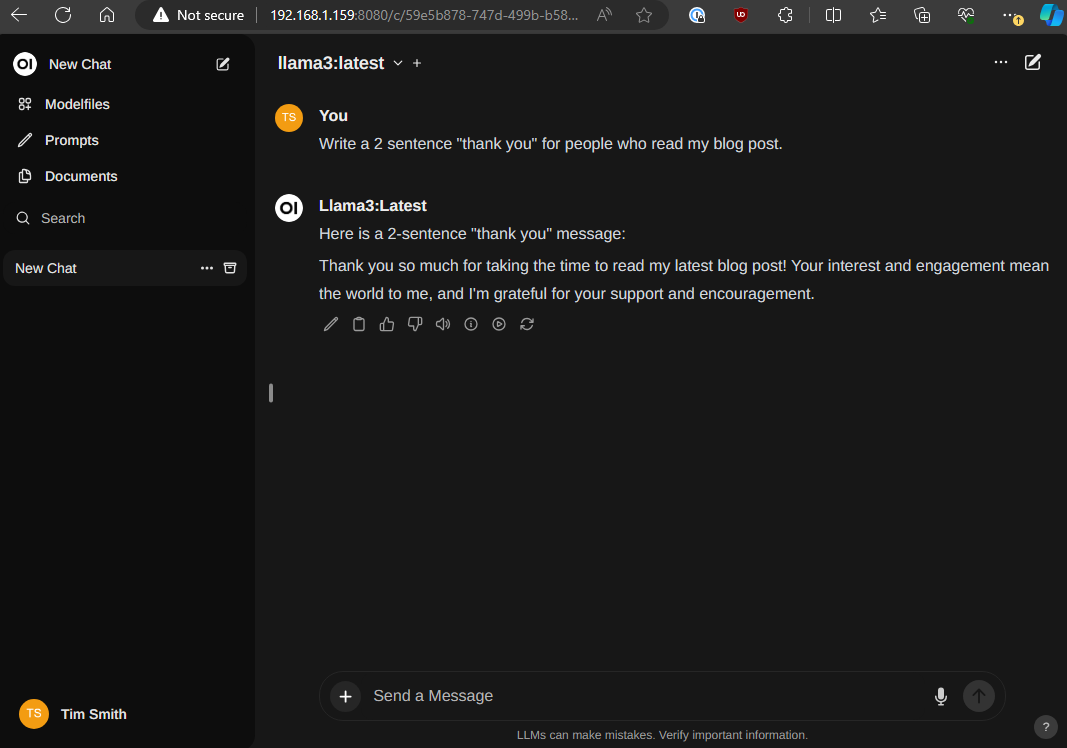
Private AI complete!
Once the container is running, I opened up my web browser to my http://192.168.1.159:8080, and was greeted with the openweb ui. The first time, you will need to register a user account. This is stored locally, and this first user will be an admin. At the top of the window once logged in, you can select a model - and since only 1 was downloaded, llama3 is the only model in the list. Now, you can ask your AI anything!